Mixed Format Labels for dummies!
Recently I wanted to try the mixed format labeling capability that North Road developed in 2022 for QGIS 3.28.
This appears to be the only documentation I can find and not being proficient in HTML it took some experimenting for me to get more complex code working consistently. I suspect I am not the only one who struggled with this so in the spirit of sharing here is my learning. More importantly this will also provide content for Em and make me feel less guilty at the same time!
Mixed format labels enables a mixture of fonts, colours, sizes, etc for a given label expression, something that cannot be done in the standard labeling engine. Warning: the workflow is a little complicated but hopefully my examples and notes will get you started.
The easiest step is to Allow HTML formatting in the Text properties section as shown in the following screen grab. This is also the easiest thing to forget to do as well and leave you wondering why all the HTML code is appearing in the label yet the preview looks OK!!
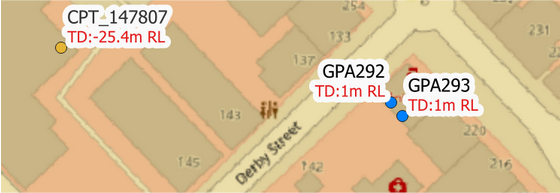
The following screenshot and code has the first line in the default text format and the second line a reduced font size and red colour.
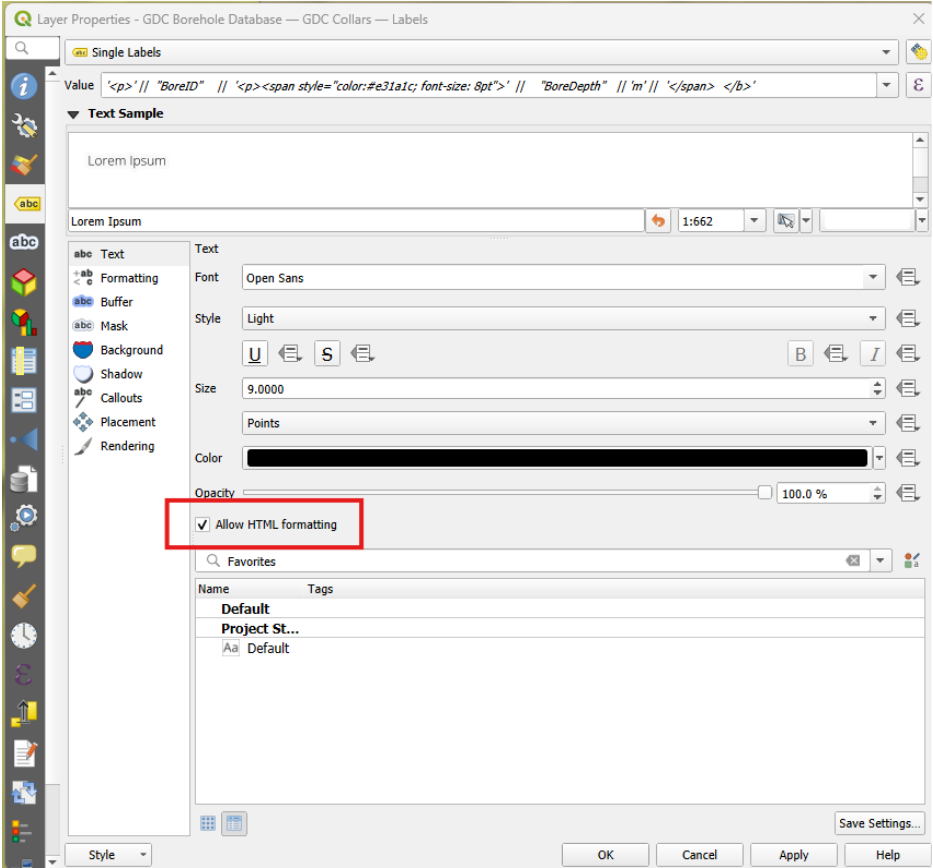
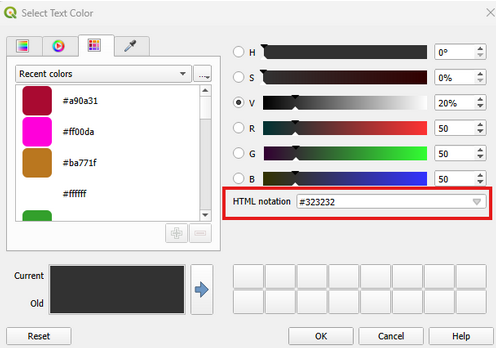
The syntax for HTML formatting in QGIS label expressions requires a change of code from a standard expression as shown in the following example. In this example BoreID takes the default label settings, BoreDepth is on a new line and is red with a different font size from the default font. The colour code can be copied from the palette in QGIS as shown in the screen grab.
'<p>' || "BoreID" || '<p><span style="color:#e31a1c; font-size: 8pt">' || round("BoreDepth", 1) || 'm' || '</span></b>'
Notes:
- Start each label expression with the
‘<p>’text - Replace the QGIS new line code
/nwith‘<p>’ - Some text properties can be defined by regular HTML tags that are paired at the beginning and end as follows:
- bold:
‘<b>’|| …….||’</b>’ - italics:
‘<i>’ || …….||’</i>’ - underline:
‘<u>’ || …….||’</u>’ - strikethrough:
‘<s>’ || …….||’</s>’
- bold:
- Other font properties may require the use of CSS (Cascading Style Sheets) notation as outlined below and in my borehole example above.
- Font families:
‘<span style=”font-family: Comic Sans MS”>’ || …….||’</span>’ - Font weights:
‘<span style=”font-weight: Comic Sans MS”>’ || …….||’</span>’ - Font color:
‘<span style=”color: #rrggbb’ || …….||’</span>’(copy the colour code from the colour palette) - Font size:
‘<span style=”font-size: 30pt”>’ || …….||’</span>’
- Font families:
- If multiple properties (such as colour and size) for a text block are required, then separate each property with a colon as shown below
‘<span style="color:#e31a1c; font-size: 8pt">’ || …….||’</span>’ - Some properties can be defined either as HTML or CSS tags:
- Bold, italics, underline, strikethrough.
- Functions such as round can be inserted in the normal manner as shown in the example above.
I am hoping this is helpful and a big thanks to the North Road team and their sponsors for developing an amazing capability.